| Better Farming Series 31 - Biogas: What it is; How it is made; How to use it (FAO, 1984, 52 p.) | ||||
| How to build a small biogas unit | ||||
| (introduction...) | ||||
| You will need | ||||
| Where to put your biogas unit | ||||
| Building the unit | ||||
| Testing for leaks | ||||
|
| |||||||||||||||||||||||||||||||||||
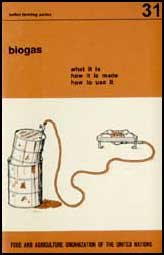
25. You can build a small biogas unit from two oil drums.
· an oil drum of about 200
litres, to hold the waste
· an oil drum of
about 120 litres, to collect the gas
Oil drums
· a piece of pipe about 10
centimetres long and about 2 centimetres in diameter, for the gas
outlet
· a valve to fit the gas outlet

Gas outlet and valve
· at least 10 metres of rubber or plastic tube about 2 centimetres in diameter, for the gas line

Gas
line
26. Be careful not to put your biogas unit too close to your home or your cooking area or your water supply.
27. A biogas unit should be at least 10 metres from your home so that when you put waste into your unit it will not be too close to where you and your family live and cook your meals.
Put the unit away from house
28. Do not put your biogas unit too far from where you cook or you will need a long gas line. Gas lines are hard to find and may cost a lot of money.
29. If your gas line is moved or damaged, it may leak when gas is made. If your gas line crosses a path, bury it a little underground to protect it from being moved or damaged.

Protect the gas line
30. A biogas unit should be at least 15 metres from your water supply, so that the waste in your unit will not make your water dirty and unhealthy to drink or use.

Put the unit away from the water
supply
31. You have already been told that you will get most gas if the temperature of your unit is between 32 arid 37°C.
32. If you live in a very hot place, put your unit out of the sun, in the shade or under trees to keep it getting too hot.

Put the unit out of sun - in hot
places
33. If you live in a place that is not very warm, put your unit in the sun to keep it warm.
Put the unit in the sun - in not
warm places
34. If you live in a cold place, put the unit underground or cover it with earth or straw to keep it warm.

Cover the unit - in cold
places
35. The bottom part of the unit, which holds the waste mixture, is made from the bigger drum. The top part of the unit, which holds the gas, is made from the smaller drum which you put inside the bigger drum.
36. Most drums have a hole in the top. You will not need a hole in the top of the bigger drum but you will need a hole in the top of the smaller drum for the gas outlet.
37. Cut out one end from each drum. You can do this using a hammer and metal chisel. Cut the end of the bigger drum that has a hole in it. Cut the end of the smaller drum that does not have a hole in it.

Use a metal chisel and a hammer
38. If the small drum does not have a hole in the top, you will have to cut one (see Item 45).
39. Now clean both drums well inside and outside to remove oil and grease .

Clean the drums
40. If either drum has a hole in the side, close it tightly. This can be done with a metal plug or by welding a piece of metal in the hole as shown in the drawings.

Close hole
41. Now you are ready to put the gas outlet in the top of the small drum.
42. The gas outlet is made from a short piece of pipe about 10 centimetres long and about 2 centimetres in diameter.
43. If there is a threaded hole in the top of the small drum, use a gas outlet which is threaded on both ends and screw it tightly into the hole.

Screw in outlet
44. If the hole in the top of the small drum is not threaded, use a gas outlet which is threaded on one end and weld it into the hole with the threaded end up
45. If there is no hole in the top of the small drum, cut one about 2 centimetres in diameter and using a gas outlet which is threaded on one end weld it into the hole with the threaded end up, as you were told in item 44.

Cut hole
46. Now you are ready to attach a valve to the top of the gas outlet. You can use valves like the ones shown in the drawing.
47. The valve you use must be airtight so that it will not leak gas and you must be sure to screw it tightly to the gas outlet.

Attach valve
48. If you do not have a valve, attach the rubber or plastic tube you are using for the gas line directly to the gas outlet. To close the gas line, you can fold it once and clamp it shut or you can fold it twice and tie it tightly with cord as shown in the drawings

Tie

Clamp
49. Now you are ready to test the small drum for leaks. To hold gas it must be airtight.
50. To check for leaks, close the valve or if you have no valve clamp or tie the gas line tightly as you were told in item 48.
51. Turn the small drum over and place it above the ground on stones or pieces of wood, but be careful not to damage the gas outlet or the valve or to loosen the clamp or the cord on the gas line. Now fill the small drum with water.
52. If you see water leaking from the drum, the gas outlet, the valve or the tied gas line, mark the place of each leak. Then empty out the water, being careful not to damage the gas outlet, and let the drum dry.

Mark the places of leak
53. Seal the leaks by coating them with tar, mastic or paint on the inside and the outside of the drum.
54. If there are leaks around the gas outlet or valve, tighten the outlet or valve again and coat the joints with tar, mastic or paint.

Tar or paint
55. When the sealing is dry, fill the drum with water again to be sure that the leaks are well sealed. If water still leaks, start over again.
56. When the small drum is well sealed and no longer leaks, your biogas unit is ready to use.
57. It is very important to seal all leaks carefully.
 |
 |