 |
| ||||||||||||||||||||||||||||||||||||||||||||||||||||||||||||||||||||||||||||||||||||||||||||||||||||||||||||||||||||||||||||||||||||||||||||||||||||||||||||||||||||||||||||||||||||||||||||||||||||||||||||||||||
|
| |||||||||||||||||||||||||||||||||||||||||||||||||||||||
by V. Ravindran
Department of Animal Science
Faculty of
Agriculture
University of Peredeniya
Sri Lanka
FOOD AND AGRICULTURE ORGANIZATION OF THE UNITED NATIONS
Rome,
1995
FAO Economic and Social Development Series No. 3/44
The designations employed and the presentation of material in this publication do not imply the expression of any opinion whatsoever on the part of the Food and Agriculture Organization of the United Nations concerning the legal status of any country, territory, city or area or of its authorities, or concerning the delimitation of its frontiers or boundaries.
David Lubin Memorial Library Cataloguing in Publication Data
Ravindram, V.
Processing of cassava and sweet potatoes for animal
feeding.
(FAO Better Farming Series, no. 44)
ISBN 92-5-103620-9
1. Cassava
2. Sweet potatoes
3. Feed processing
4.
Animal feeding
I. Title
II. Series
III. FAO, Rome (Italy)
FAO code: 23
AGRIS: Q52 L02
All rights reserved. No part of this publication may be reproduced, stored in a retrieval system, or transmitted in any form or by any means, electronic, mechanical, photocopying or otherwise, without the prior permission of the copyright owner Applications for such permission, with a statement of the purpose and extent of the reproduction, should be addressed to the Director, Publications Division, Food and Agriculture Organization of the United Nations, Viale delle Terme di Caracalla, 00100 Rome, Italy.
|
| |||||||||||||||||||||||||||||||||||||||||||||||||||||||
Preface
The first 26 volumes in FAO's Better Farming Series were based on the Cours d'apprentissage agricole prepared in Cote d'lvoire by the Institut africain de developpement economique et social for use by extension workers. Later volumes, beginning with No. 27, have been prepared by FAO for use in agricultural development at the farm and family level. The approach has deliberately been a general one, the intention being to create a basic model that can be modified or expanded according to local conditions of agriculture.
Many of the booklets deal with specific crops and techniques, while others are intended to give farmers more general information that can help them to understand why they do what they do, so that they will be able to do it better.
Adaptations of the series, or individual volumes in it, have been published in Amharic, Arabic, Armenian, Bengali, Creole, Ewe, Gipende, Hindi, Igala, Indonesian, Kiswahili, Malagasy, Malaysian, Nepali, Oriya, SiSwati, Thai, Tschiluba, Turkish, Urdu and Vietnamese.
Requests for permission to issue this booklet in other languages and to adapt it according to local climatic and ecological conditions are welcomed. They should be addressed to the Director, Publications Division, Food and Agriculture Organization of the United Nations, Viale delle Terme di Caracalla, 00100 Rome, Italy.
|
| |||||||||||||||||||||||||||||||||||||||||||||||||||||||
Introduction
1. Roots and tubers are important foods for people living in warm, tropical climates. In these crops, the roots or underground stems store food reserves and become swollen.
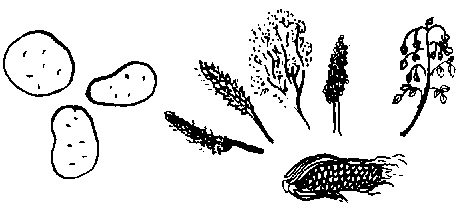
2. The most important root and tuber crops are cassava, sweet potato, yams, taro (cocoyam) and tannia (new cocoyam).
3. In Booklet No. 16, you learned about growing different kinds of roots and tubers. In this booklet, we shall deal with two root and tuber crops that are most important.
Cassava and sweet potato
4. Cassava roots and sweet potato tubers are good energy foods. When you eat them, they give energy to your body. They are good energy feeds for animals as well.
5. If you have extra roots and tubers that you can spare, it is a good idea to use them to feed animals.
6. By feeding farm- grown roots and tubers:
- You don't have to purchase energy feeds from outside.
- Feed from outside is always expensive. You can save money by using cassava and sweet potatoes that are produced on your farm.
- When you are using farm- produced feeds, you can plan to have more animals. Then you will have more meat and milk for your family to eat or to sell.
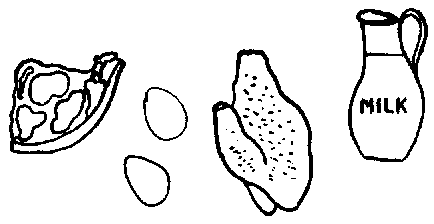
Meat and milk
7. In Africa, cassava is a staple food. It is used mainly for human consumption. Only those roots that are unsuitable for human consumption are used to feed animals.
8. In many countries, more and more people are growing cassava and sweet potatoes for the feeding of animals.
9. In Thailand, cassava is an important crop. Cassava is grown mainly for the production of animal feed.
10. Brazil, Colombia, Mexico, Malaysia, Indonesia, Paraguay and the Philippines are some of the countries where people are beginning to use more and more cassava in animal feeding.
11. Over 80 percent of the world sweet potato crop comes from the People's Republic of China. Chinese farmers use sweet potatoes to feed pigs.
12. In many areas, people do not know how to process cassava roots and sweet potato tubers and keep them for a long time before feeding them to animals.
13. In this booklet, you will learn about the feed value and the processing methods of cassava and sweet potatoes.
14. In Booklet No. 46 you will learn how you can use the processed materials to feed animals.
|
| ||||||||||||||||||||||||||||||
Better Farming Series 44 - Processing of Cassava and Sweet Potatoes for Animal Feeding (FAO, 1995, 49 p.)
About the cassava plant
15. In different countries, cassava is known by different names. In your country, it may be known by one of the following names: yuca, manioc, tapioca or mandioca.
16. Cassava is an important crop in warm climates because:
- it can adapt to many conditions;
- it can grow in areas
with little rain;
- it can grow and produce in poor soil;
- it is hardy
and easy to grow;
- it is free from serious insect pests and diseases.
That is why cassava is a popular crop in most tropical countries.
17. The number of swollen roots in a plant and their size vary greatly among different cultivars of cassava. You usually get between five and ten roots in a plant.
Leave
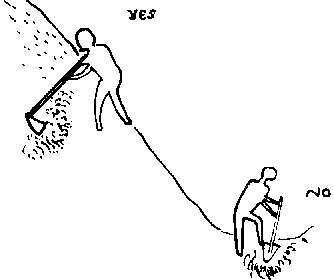
18. Once the roots have matured, you can harvest them at any time. If you do not need the roots immediately, leave them with the plant.
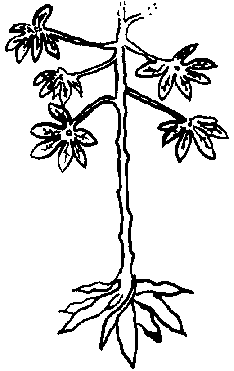
Cassava plant
19. This is a big advantage of cassava. You can leave the roots underground even after they mature. This is called underground storage of cassava roots.
20. Different cultivars of cassava mature at different rates. But we can group them into two types.
Short- season cultivars have roots that are ready for harvest in six to nine months after planting. They produce sweet roots.
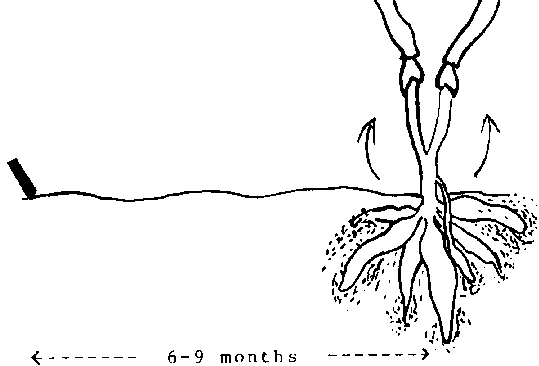
Short- season cultivars
Long- season cultivars have roots that are ready for harvest in 12 to 15 months. They produce bitter roots.
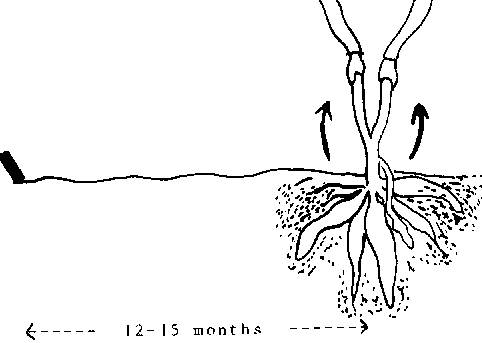
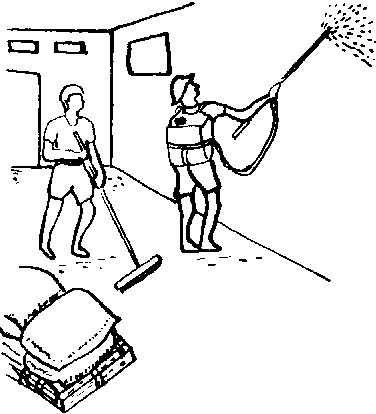
Long- season
cultivars
What root yields can you get?
21. Cassava root yields vary widely in different regions:
- In Africa, Central America and the Caribbean, the average yield is 6 400 kg of roots from a hectare.
- In Asia and South America, the average yield is 11 600 kg per hectare.
22. You can get much higher yields. A good farmer using recommended cultivars and cultivation practices can expect up to 40 000 kg per hectare.
23. If you are getting low root yields, talk to your extension worker. Find out how you can increase yields.
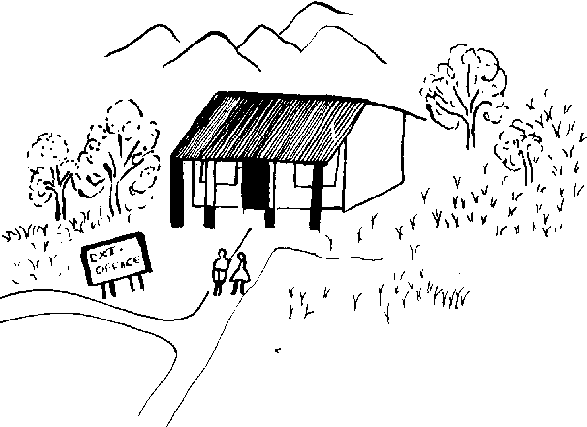
Extension
worker
Feed value of cassava roots
24. Cassava root is a carbohydrate food. It contains a lot of carbohydrates in its dry matter. There are more carbohydrates in cassava roots than in cereals and other tubers.
Cassava root is a carbohydrate
food
25. The amounts of carbohydrates contained in 1 kg dry matter of different foods are given below.
|
Cassava roots |
920 g |
|
Sweet potato tubers |
890 g |
|
Yams |
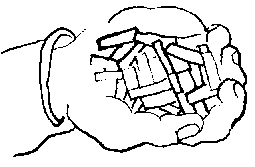
860 g |
|
Rice |
840 g |
|
Maize |
830 g |
|
Sorghum |
810 g |
|
Millet |
800 g |
26. You know that cassava root is starchy. The carbohydrates in cassava root are made mainly of starch. Cassava starch is highly digestible for all animals.
27. Dried cassava roots contain a similar amount of energy to cereal grains. So you can use cassava roots instead of cereal grains in animal feeding.
28. Cassava roots do not have much protein. Protein is necessary for the building up of body muscles and for animals to grow.
29. The amounts of protein that you can get from 1 kg of dried cassava roots and some other energy feeds are given below.
|
Cassava roots |
25 g |
|
Sweet potato tubers |
45 g |
|
Yams |
80 g |
|
Rice |
60 g |
|
Maize |
90 g |
|
Sorghum |
100 g |
30. This means that you cannot use cassava roots as the sole feed. You must always use them with feeds that will supply enough protein.
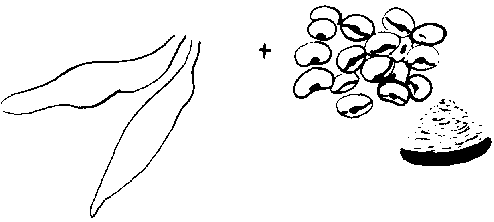
You cannot use cassava roots as
the sole feed
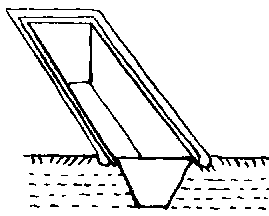
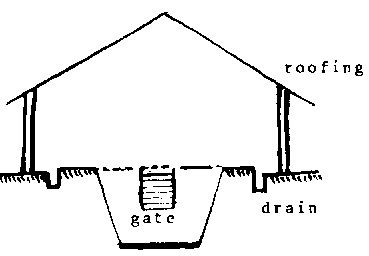
31. Cassava root is not a good source of minerals and vitamins. It contains low amounts of minerals and vitamins.
32. Minerals and vitamins are necessary to keep animals healthy.
33. This means that when you are using a lot of cassava to feed the animals, you must combine it with feeds that are rich in vitamins and minerals.
34. This is true for most feed materials. Whatever the feed material you may be using, you must always combine it with other feeds to get a balance of minerals and vitamins.
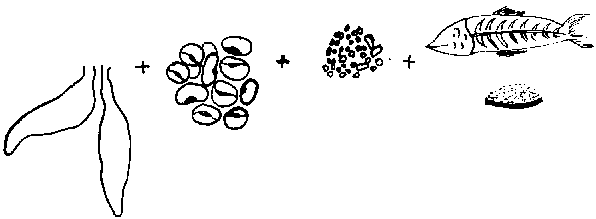
Combine feed
35. You can purchase the vitamins and minerals from your dealer in the form of supplements:
- Shell grit supplies calcium.
- Bone meal and dicalcium
phosphate supply calcium and phosphorus.
- Vitamins and other minerals are
available in small packets as premixes.

Bone meal, vitamins and other
36. Cheaper feeds, such as leaves, can also be used to supply vitamins and minerals

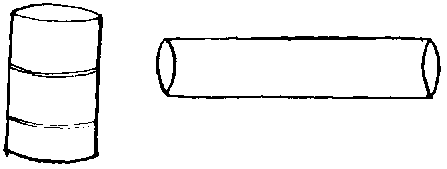
Cheaper
feeds
The problem of cyanide in cassava
37. Fresh cassava roots contain a poisonous substance called hydrocyanic acid. It is also known as prussic acid. If fresh cassava roots are eaten, this poison can make people, as well as animals, very sick.

Animal
38. Some people do not like to use cassava roots because they have this poison.
39. Fortunately, there are simple ways of reducing this poison. You should know that:
- there are cassava cultivars with low levels of cyanide;
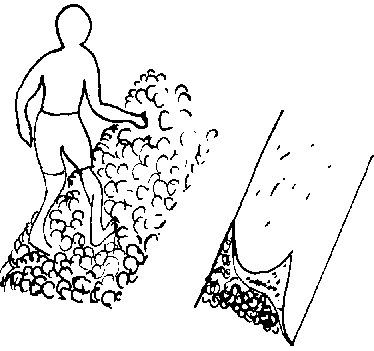
-
the outer peel of the roots has more cyanide than the flesh;
- cyanide levels
can be lowered by proper preparation of the roots;
- the bad effects of this
poison can be overcome by feeding protein feeds along with the cassava.
Some cultivars have low cyanide levels
40. Some cultivars have low levels of cyanide and do not cause any problems. These cultivars usually produce sweet roots.
41. Some cultivars contain high levels of cyanide. They can be poisonous. These cultivars usually produce bitter roots.
42. If you know whether the cultivar that you are growing is bitter or sweet, you can get an idea of the cyanide level in its fresh roots and take precautions.
Outer peel has more cyanide.
43. The outer peel of the cassava root has ten times more cyanide than the inner flesh.
44. You know that the peel can be loosened and easily removed from the flesh. Removing the peel makes roots less harmful.
Peel
Processing can reduce cyanide levels
45. If cassava has this poison, you may ask how it can be used as a feed.
46. Cyanide in cassava roots is not a problem if you:
- process the roots properly;
- feed the roots together with other feeds which help the body to overcome the bad effects of cyanide.
47. How can you reduce the cyanide levels? You can remove part of the cyanide by drying, heating or boiling the roots.

Cianide
48. Some of the cyanide can also be leached out by soaking the roots overnight in water.
49 When you cut or grate the roots, a good part of the cyanide is released.
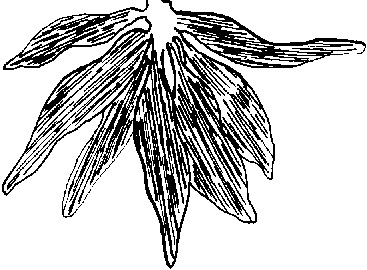
50. You can also reduce cyanide levels by fermentation.
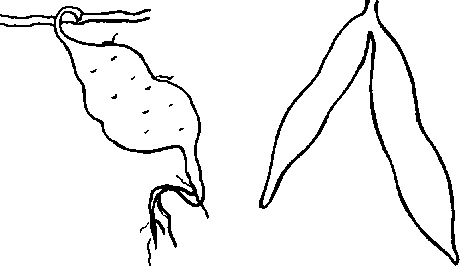
51. You can see that there are many ways of reducing the cyanide in cassava roots:
- cutting or grating;
- soaking in water;
- boiling or
roasting;
- drying;
- fermentation.
52. Combinations of these methods are more effective in reducing the cyanide.
Protein feeds must be given
53. Good protein feeds are necessary when you are eating or feeding cassava roots.
54. You must eat good protein foods such as pulses, meat. eggs or fish.
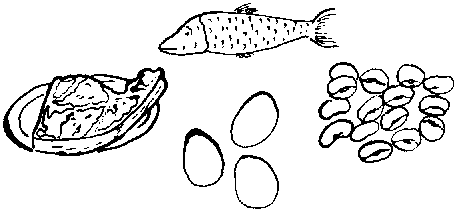
Pulses, meat. eggs or fish
55. When enough protein is eaten, the body changes cyanide into a less harmful substance.
|
| ||||||||||||||||||||
Better Farming Series 44 - Processing of Cassava and Sweet Potatoes for Animal Feeding (FAO, 1995, 49 p.)
Harvesting of cassava roots
56. Harvesting of cassava roots is easy, because the roots start at the stem just below the soil surface.
57. If the soil in your area is light, you can lift the roots by gentle pulling.

Roots by gentle pulling
58. When you lift the roots, take care not to damage them. Damaged roots spoil very quickly.
Cassava roots spoil quickly
59. Cassava roots have a lot of moisture in them and they can spoil quickly. When damaged, the roots spoil even more quickly.
60. Once harvested, the roots cannot be kept for more than two days. You must use or sell them quickly. You can also process them into dried chips or silage.
61. Dried chips and silage keep well. They can be stored for a long time without spoiling.
|
| |||||||||||||||||||||||||||||||||||||||||||||
Better Farming Series 44 - Processing of Cassava and Sweet Potatoes for Animal Feeding (FAO, 1995, 49 p.)
Processing of cassava into dried chips
62. It is not difficult to produce cassava chips. Here are some things that you should know about how to dry cassava roots.
63. You do not need many things to produce cassava chips. You need
- enough cassava roots on your farm;
- knives or a
shredder;
- a place to dry the chips;
- your
time.
Roots must be processed quickly
64. You must try to prepare good quality chips. Good quality chips can be kept for longer.
65. To get good quality chips, you must start processing immediately after harvest.
66. Do not use any tubers that are damaged or spoiled. Such tubers must be removed before you start processing.
67. When you prepare dried chips, there are three major steps in the process;
- preparation of the roots;
- chopping or shredding of the
roots;
- drying of the
chips.
Preparation of the roots
68. First of all, you must clean the roots in water to remove any soil clinging to them.
clean the roots
69. Then you must remove the peel of the roots. If you do not remove the peel, the chips will be brownish in colour and will contain a lot of cyanide.
70. If you zremove the peel, you will lose 10 to 15 percent of the root weight. But the colour of the chips will be whiter and they will have more market value.

Zremove the peel
71. If you are planning to use the chips for feeding animals on your farm, the brownish colour will not matter. Then you may not have to remove the peel.
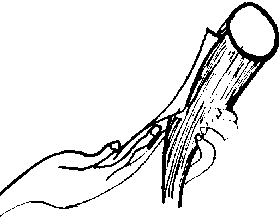
Chopping or shredding of the roots
72. To make the drying process quicker, you must reduce the size of the roots. You must chop or shred them.
73. By chopping the roots, you increase the surface area that is exposed to the air. This makes the drying faster.
74. You can cut the roots in whatever shape you like:
- They can be in slices.
- They can be in long strips.
-
They can be in big chunks.
75. For quick drying, the thickness must not be more than 5 cm. For the best drying, chips should be about 2 cm in thickness.
76. Cutting the roots also releases the cyanide and helps to reduce cyanide levels.
77. When you are cutting a lot of roots, you must work in an open area with good ventilation.
Area with good ventilation
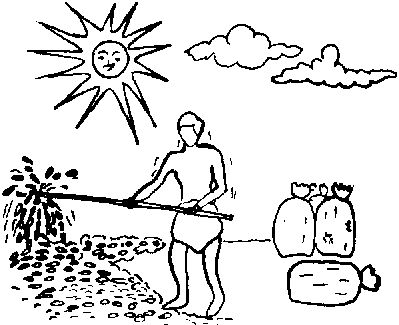
78. Never cut the roots in a closed room. The cyanide that is released can accumulate in the room and make you sick.
79. You can cut the roots by hand or using a simple shredder. When you have small amounts of roots to process you can handle the work manually using knives.
80. Ideally you should harvest the roots early in the morning, chip them as quickly as possible and start drying by mid- morning.
81. Using a shredder or chopper to cut the roots can save you a lot of labour and time. The shredder can be hand- operated or motor- operated.
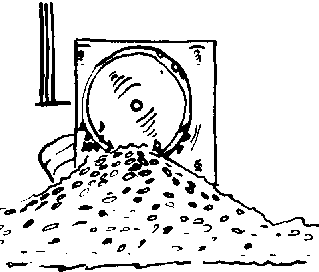
hand- operated or motor- operated
82. Making a shredder does not cost much. Your local blacksmith can make you a simple machine.
The machine will basically have:
- rotating knife blades mounted on a wooden frame;
- a hopper
into which the roots are fed.
83. If several people in your area are interested, you can join together in a cooperative to get a shredder and other facilities and you can all use them. Such cooperatives have been very successful in Brazil and Colombia.
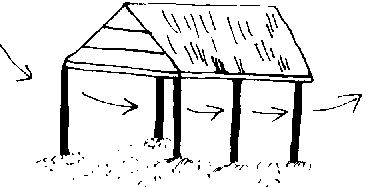
Drying of the chips
84. Sun-drying is the method farmers everywhere use to dry cassava chips.
Drying cassava chips
85. You can practice sun- drying during the dry season only; when there is no rain.
86. You must dry the chips as quickly as possible.
87. If a long time is taken to dry the chips, moulds may grow. The quality of the chips will not be good.
88. You can dry the chips in several ways:
- on the floor;
- in trays;
- on mats.
89. Many farmers dry chips on the floor. For a drying floor, you can use any area that is convenient to you, such as:
- rock surfaces;
- roof tops;
- front yards;
- concrete
floors.
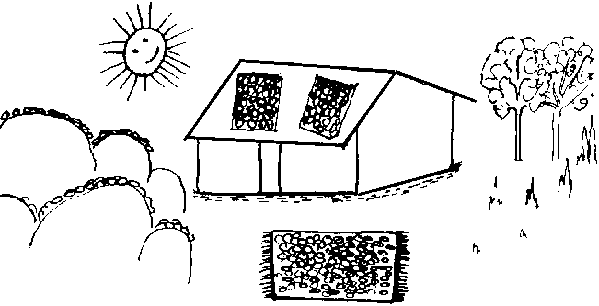
Dry the chips on rocks
90. If there are rock surfaces around your farm, you can dry the chips on rocks. Rocks become very hot during the day and the chips will dry very quickly.
91. A concrete floor is very effective. It is used in many countries. A floor becomes very hot with the sun's radiation and the chips dry quickly.
92. In some areas, a concrete surface painted with black paint is used. This makes the surface absorb more heat and it becomes much hotter.
93. You can make the drying quicker by placing the chips in trays raised above the ground.
94. You can make trays easily from a wooden frame and the wire mesh that you use in chicken houses.
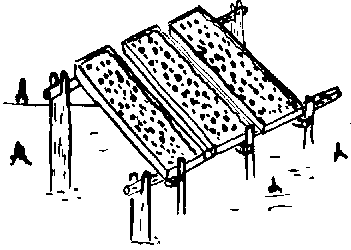
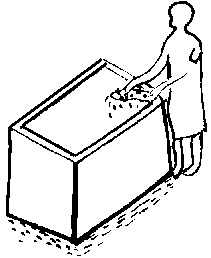
Trays
95. This is a very efficient method of drying, because the chips get heat in three ways:
- direct heat from the sun;
- heat reflected from the
ground;
- heat brought by air circulation.
How to spread the chips
96. The chips must be spread in a single uniform layer. This will make them dry more quickly.
97. If you are drying on a floor, you must not spread more than 12 kg of chips over an area of 1 m².
98. If you use more than this amount, drying will be slower. It will take a long time to dry the chips.
99. If you are using trays, you can spread up to 30 kg of chips over 1 m².
100. When the chips are drying, you must turn them from time to time to get a uniform drying.
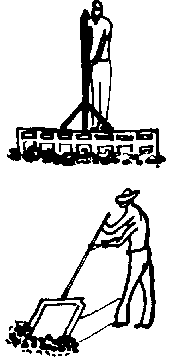
Get a uniform drying
101. At first, you must turn the chips every one to two hours. After that, you can turn them periodically as you feel it necessary until they are fully dried.
How long should the drying take?
102. Fresh cassava chips are more than 65 percent water. You must dry them until the water content becomes less than 14 percent. Only then can you store them for a long time.
103. You must try to dry the chips as quickly as possible, otherwise moulds may grow. Chips with moulds have no feed value and have to be thrown away.
104. You know well that the drying time depends mainly on the weather that you have while the chips are drying.
105. In sunny, dry weather, you can completely dry the chips in one to three days, depending on the thickness of the chips.
106. If the slices are thin, they will dry faster. In sunny, dry weather, thin slices will dry in less than a day and a half.
Thick slices may take up to three days to dry.
Testing of dried chips
107. You must test the chips to see whether they have dried properly.
108. They can be tested in a simple way. You take the chips in your hand and crush. If they are well dried, they will break easily and will not crumble into pieces.

Crash the chips in hand
109. If the chips are well dried, you can write with them as if they were chalks. This is another test that you can use.
Rains - a problem during drying
110. Rain is the biggest problem during drying. If it rains while the chips are being dried, you must collect the chips and pile them under a roof.
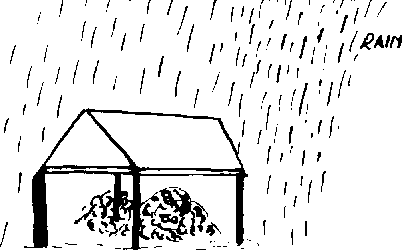
It is bad for chips to get wet
111. It is bad for chips to get wet during drying. Wetting the chips while they are drying will:
- Iead to mould growth;
- increase spoilage.
112. If you expect wet weather, you can take precautions to prevent mould from forming. You can apply a salt solution to the fresh chips before drying.
113. The salt solution can be prepared by dissolving a handful of common salt in a litre of water.
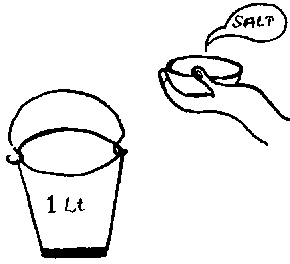
Dissolving a handful of common
salt in a litre of water
Proper drying is essential
114. Proper drying is essential if you want to produce chips that can be kept for a long time.
115. From 100 kg of fresh roots, you get about 40 kg of dried chips. So when you dry, you also reduce the bulk of roots and storage becomes easier.
100 kg fresh roots 40 kg dried
chips
Storage of dried chips
116. If a product is not properly dried and still contains moisture, it can easily be spoiled by moulds and insects.
117. Well dried cassava chips can be stored for 6 to 12 months.
How should you store the chips?
118. If you want to keep the chips for a long time, you must not store them in open containers.
119. You must store them in closed containers. Otherwise they will be attacked by insects.
120. Insect attack can be a big problem in the long- term storage of dried chips.

Figure
121. If bags are used, they must be lined with polyethelene sheets and be tightly closed. Then insects cannot get in.
122. Bags and gunny sacks must be stored on wooden pallets. This will increase the flow of air and also prevent direct contact with the floor.
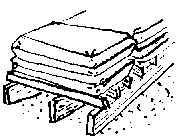
Wooden pallets
123. You can use containers made of wood or metal to store the cassava chips. Containers can be made effective by lining them with polyethelene sheets.
124. If it has rained during the drying process or if it took a long time to dry the chips, there is a strong chance that mould will grow and insects attack. You can protect the chips from this by sprinkling them with a salt solution while drying and then storing them carefully.
125. There is another way by which the storage life of the chips can be increased. Immerse the fresh chips in boiling water for ten minutes and then dry them in the usual way. These chips will have a long storage life.
126. Freshly harvested cereals carry insects inside the grain, whereas freshly dried cassava chips have no insects within them.
The insects will come from the storage environment.
127. The storage area must be kept clean and well ventilated. In a good storage environment, you can keep insects out and store the dried chips for a long time.
The storage
area
Further processing of dried chips
128. Cassava chips occupy considerable space. By milling the chips or pounding them in a mortar, you can reduce the volume.

Reducing volume
129. The flour that you prepare by grinding the dried chips is called cassava meal.
130. Cassava meal keeps well in storage. It is not affected by insects as the dried chips are.
131. Cassava meal must be stored in airtight containers because it will absorb water from outside, become moist and can get spoiled.
132. In Thailand, Malaysia and Indonesia, cassava is processed and exported to Europe for use as an animal feed. In Colombia and Brazil, more and more farmers are processing cassava and selling it as dried chips.
133. In these countries, part of the cassava is marketed as dried chips. The balance is marketed as pellets.
134. Pellets are made by pressing the meal into a cylindrical shape. Pellets are made in different sizes, but are usually about 2 to 3 cm long and 0.6 cm in diameter.
135. To make pellets, you need a special machine. Pelleting machines are expensive
136. Pellets have several advantages over cassava meal:
- They are less bulky.
- They are not dusty.
- They can be
handled easily.
- They get a high price.
Cassava chips
137. Once you are experienced in making cassava chips, you may be interested in making pellets and selling them for more money.
|
| ||||||||||||||||||||||||||||||||||||||||
Better Farming Series 44 - Processing of Cassava and Sweet Potatoes for Animal Feeding (FAO, 1995, 49 p.)
Preservation of roots as silage
138. If you live in a place where it rains most of the year, where you cannot dry chips, making silage is the best way of preserving the roots for a long time.
What is silage?
139. When feed materials are preserved under airtight, anaerobic conditions, the succulent product that is obtained is called silage.
140. The process of making silage is known as ensiling. The airtight place or container where silage is made is called a silo.
141. Under airtight conditions, carbohydrates in feed materials undergo fermentation and produce acids. No mould or bad organisms will grow when a material is in acidic conditions.
142. So the silage can be preserved and the material can be stored for a long time without spoilage.
143. You may have made pickles at home. Making silage is somewhat like making pickles. In pickling, you add acid from outside and preserve the food. In ensiling, acid is formed within the material.
144. What are the things you need to make silage from cassava roots? You need:
- cassava roots;
- knives or a chopper;
- a
silo.
Type of silo to use
145. Various types of silos have been made and used for ensiling. Trench silos (or pit silos) are the best- suited for tropical areas.
146. Building a trench silo is simple. You dig the soil and make a hole in the ground with some fortifications. This trench can be used as a silo. This is a trench silo.
How to build the trench silo
147. Dig a hole in the ground. The length, width and depth of the hole will depend on how much silage you want to make.
148. In a silo with a volume of 2 m³ (2 m long by 1 m wide by 1 m deep) you can pack about 1 000 kg of fresh chips.
149. The best place to put the trench silo is on a slope or hillside. This makes drainage easy.
Silo
150. The trench has to be made rather long. A rectangular- shaped silo is desirable.
The trench
151. The walls of the silo should narrow from top to bottom. The floor should slope towards the opening.
152. You must have a small drain at the bottom end to drain off any liquid coming from the silo.
153. You can also put stones in the bottom to increase the drainage.
154. If possible, you should cut into the centre of the front wall of the silo and make a gate.
155. You can fill the silo and remove the silage through this gate.
156. After the silo is filled, the gate must be sealed. You can use wooden planks or sticks for sealing.
Use wooden planks or sticks
157. In areas with high rainfall, you have to prevent rain from entering the silo:
- You must build a simple roof above the silo.
- You must cut
a drain around the silo.
158. If you do not have a lot of material to ensile, you can use any container that can be packed airtight.
159. You can use oil drums, concrete pipes and even thick polyethelene bags.
Pipes
160. You must line these with polyethelene sheeting and have a small outlet in the bottom for drainage. They must be kept on a concrete floor for easy drainage.
Size of the silo
161. The size of the silo that you want to build will depend on how much silage you want to make.
162. But the depth of the silo must not be more than 2.5 m and the width no more than 3 m.
163. In larger silos, packing is not efficient and spoilage may be high.
164. If you want to make more silage, do not increase the depth or the width of the trench. Either increase the length of the trench or build another silo.
165. When you have several silos, you can develop a feeding plan and use them one after another to feed your animals from.
Filling the silo
166. Chop fresh, unpeeled roots and start filling the silo. When the roots are chopped, they pack well and the silo can be made airtight.
167. Tight packing is essential. If air gets trapped inside the silo, the roots will spoil instead of fermenting.
168. You must do the filling in layers of roots and then press as hard as possible by treading on them.
Treding on roots
169. To reduce spoilage, you need to fill the silo within a day.
170. Once you have filled the silo, the top must be covered airtight. You can use grass, leaves or thick polyethelene sheeting for cover.
171. This cover must be sealed again to ensure further airtight conditions. You can use wood shavings, sticks, earth, tiles or stones.
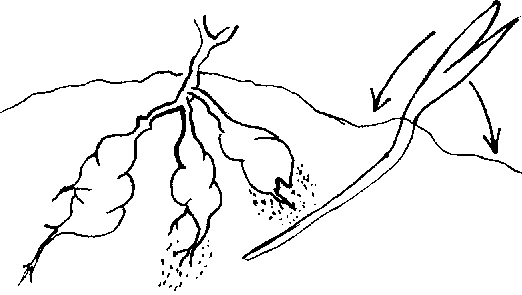
172. Over the next few days after filling, you will see the volume of silage reduce. You must watch for this and add more earth or stones to prevent air from entering.
173. If you do not watch for this, air will enter. Moulds will develop and the silage will be spoiled.
Cassava root silage
174. Cassava root silage will be ready for feeding in four weeks. If you do not open the silo, silage can be preserved without any spoilage for six months.
175. Good cassava root silage will be light brown in colour, succulent and have a pleasant smell.
176. When the silage is removed you must expose only a small area. If you have a gate, you must remove silage through the gate.
177. You must remove the silage as quickly as possible.
178. When you are making silage, even if you take all precautions, you will find there is some spoilage.
179. Usually there will be some spoilage in the corners, near the walls and near the gate. These losses are acceptable in any silage making.
180. If you want to make silage, but have never made it before, make it in small amounts on a trial basis. When you are more experienced you can start making larger amounts.
|
| |||||||||||||||||||||||||
Better Farming Series 44 - Processing of Cassava and Sweet Potatoes for Animal Feeding (FAO, 1995, 49 p.)
About the sweet potato plant
181. Up to now in this booklet, we have learned about cassava. Let us now study sweet potatoes. We will learn about the feed value of sweet potato tubers and how to process them.
182. Sweet potato tubers are starchy like cassava roots.
183. Sweet potatoes are an important source of food in Asia and the Pacific. They are a major crop in China, the Philippines, Papua New Guinea and Pacific Islands.
184. More than 90 percent of world sweet potato production comes from Asia. China is the world's largest producer. It produces over 80 percent of world production.
185. Sweet potato is a creeping plant. It is a perennial and can grow for several years.
186. But it is cultivated now mainly as an annual crop.
187. The herbaceous stem of the sweet potato plant is called the vine. The vines are thin and trailing.
188. Some sweet potato cultivars grow like a bush. Some cultivars have vines of medium length. Others have long vines.
189. The size and shape of the leaves also vary widely among different cultivars. At least 15 different leaf types are known.

Leaves
190. Sweet potato tubers differ greatly in shape, colour of skin and colour of flesh.
191. Tubers may be round or elongated. The colour of the skin can be white, yellow, orange, red, purple or brown. The colour of the flesh can be white, yellow, orange, reddish or purple.
Time of tuber harvest
192. You have learned in Booklet No. 16 how to grow sweet potatoes.
193. In the humid tropics, sweet potatoes can be grown throughout most of the year. You can plant and grow them at any time of the year.
194. The age at which sweet potatoes should be harvested is determined by the type of cultivar. Some cultivars can be harvested 90 days after planting. Other cultivars may require as long as 350 days.
195. In many countries, tubers are usually harvested progressively as they develop and as they are needed.
196. As with cassava, ground storage can be used for sweet potatoes. For example, 90- day cultivars can be left underground for another 45 days after maturing.
197. The time for harvesting is also determined by the weather and pest problems in the area.
198. If heavy rains are expected, you must uproot the tubers early. Otherwise they will rot. If insect pests are a problem, you must harvest the tubers before damage becomes severe.
What tuber yields can you get?
199. Sweet potato plants yield more food than cassava plants do.
The average yield of cassava roots worldwide is 9 600 kg to the hectare, whereas the average yield of sweet potato tubers worldwide is 13 900 kg to the hectare.
200. In average farms, tuber yields vary from 5 000 to 11 000 kg to the hectare.
201. In some parts of China, the average yield of tubers is 17 000 kg to the hectare.
|
| |||||||||||||||||||||||||||||||||||||||||||||
Better Farming Series 44 - Processing of Cassava and Sweet Potatoes for Animal Feeding (FAO, 1995, 49 p.)
About sweet potato tubers
202. In most countries sweet potato tubers are used mainly as a human food. Only small amounts are used for animal feeding.
203. In Indonesia, the Philippines, Thailand, Papua New Guinea and Pacific Islands, about 10 to 15 percent of sweet potato production is used to feed animals, especially pigs.
204. In Japan and Malaysia, 20 to 30 percent of sweet potato production is used as an animal feed.
205. In China, most farmers use sweet potatoes for animal feeding. Chinese farmers know that sweet potatoes are a good feed.
Feed value of tubers
206. Chinese farmers consider the whole sweet potato plant as a valuable animal feed. Both the tuber and the vine are used; nothing is wasted.
207. Sweet potato tubers are energy feeds. The amounts of energy that animals can get from 1 kg of sweet potato tubers and 1 kg of cassava roots are equal.
208. But sweet potatoes are better protein feeds than cassava roots.
209. On average, sweet potato tubers have 3.5 to 5 percent protein content. A kilogram of dried tubers will give 35 to 50 9 of protein. From Paragraph No. 50, you can see that this protein value is intermediate to the values of cassava and maize.
210. You have learned that cassava roots are low in minerals. Sweet potato tubers also do not have a high mineral content.
211. Sweet potatoes are, however, a better source of several vitamins, especially those tubers that have yellow or orange flesh.
Trypsin inhibitor in tubers
212. Unlike cassava roots, sweet potatoes do not contain any poisonous substances.
213. But sweet potato tubers must not be fed uncooked because they contain a substance that can affect animals digestion of protein. This substance is called trypsin inhibitor.
214. When a feed contains trypsin inhibitor, protein will not be well digested and animals will grow slowly.
215. The level of inhibitor in tubers varies depending on the cultivar type. Most cultivars will not cause any problems.
216. Some cultivars, however, have high levels of inhibitor. If you feed uncooked tubers from these cultivars, animals will not grow well.
217. You should not get overconcerned about this substance in sweet potato tubers. You use many other foods every day that contain far more trypsin inhibitor than sweet potatoes do.
218. Beans, cowpea, green gram, soybean and other legumes have very high levels of trypsin inhibitor. But we still use them every day in our diets. How?
219. We cook or boil them before eating. Cooking and boiling completely destroy this substance. Once cooked, there are no problems.
220. Similarly, you can process sweet potato tubers into safe feeds by boiling or baking them.
Harvesting of tubers
221. Harvesting sweet potato tubers is easy. To dig the tubers from the soil, you need only simple implements. You can use sticks, a spade or a hoe.
Harvesting sweet potato
222. The tubers must be dug carefully. The skin of tubers can be bruised or damaged easily.
223. Damaged tubers will lose weight and spoil quickly.
224. Often the whole tuber will not spoil. Only the damaged part will become infected with moulds. These moulds produce toxins.
225. These toxins can cause serious problems. You must avoid feeding infected and mouldy tubers to your animals.
226. The infected parts must be trimmed and thrown away before feeding.
Progressive harvesting
227. Progressive harvesting of sweet potato tubers is practised in many countries.
228. Large tubers are harvested first without disturbing the smaller ones, which are left to enlarge and harvested later.
229. Ground storage of sweet potatoes has some problems. You should know them.
If sweet potato weevils or termites are present, the tubers can be affected.
If heavy rains occur, the tubers may start rotting.
Curing of tubers
230. Freshly harvested sweet potato tubers can be kept for a few days without any problems. After a few days, the quality of the tubers will drop.
231. For longer storage, freshly harvested tubers must be cured. Curing will reduce weight loss and spoilage.
232. Curing also helps in the healing of damaged areas.
233. Curing is most effective at high temperatures (28 to 30° C) and at high relative humidity (85 to 90 percent).
234. Fortunately these are the conditions that are commonly experienced in tropical areas. Curing is therefore easy in tropical climates.
235. Good ventilation during curing helps in the quick healing of damaged areas.
236. If ventilation is poor, tubers will not be cured. Instead they will start to rot.
237. Curing can be done in a well- ventilated shed or in the sun. Curing for four to six days is sufficient.
Storage of tubers
238. If good storage principles are followed, cured tubers can be kept for three to four months.
239. Different methods of storage are used in different countries.
In the Philippines and Trinidad, cured tubers are stored in pits covered with dry sand.
In Barbados, mounds (or clamps) of dry sand are used.
240. Other storage methods include
- stacking in sheds;
- stacking on raised platforms;
-
storing in heaps on the floor;
- storing in baskets;
- storing in roof
spaces.
241. There is a big problem in the storage of sweet potatoes. That is sweet potato weevil. This pest can also attack the tuber while it is in the field before harvesting.
242. The weevils multiply quickly and riddle and destroy the tubers.
Weevil
243. If you are living in an area where weevil is a problem, you
must take precautions to control the pest.
244. You can practice:
- crop rotation;
- the use of cultivars that are resistant to
weevils;
- the use of
insecticide.
|
| ||||||||||||||||||||
Better Farming Series 44 - Processing of Cassava and Sweet Potatoes for Animal Feeding (FAO, 1995, 49 p.)
Processing into dried chips
245. For long- term storage, sweet potato tubers must be preserved as dried chips. In China, the tubers are also preserved as silage.
246. You have already learned about making chips from cassava roots. The preparation of dried chips from sweet potato tubers is a similar process to making cassava chips.
247. In a way, it is easier to make sweet potato chips than cassava chips.
248. You don't have to remove the peel. You also don't have to worry about cyanide.
249. You must start processing the tubers within a day of harvest.
250. When you prepare sweet potato chips, the following steps must be followed.
251. Cleaning
The tubers must be cleaned first to remove soil and dirt.
252. Chopping
Tubers can be chopped manually or using a simple hand- operated chopper. You know that thin slices dry more quickly than thick slices.
253. Blanching
If you suspect that the tubers have high levels of trypsin inhibitor, you may have to follow an additional step. Dip the chips in boiling water for two minutes. This is called blanching.
254. Drying
The chips can be dried just like the cassava root chips.
255. You can prepare about 35 to 40 kg of dried chips from 100 kg of fresh sweet potato tubers.
Storage of dried chips
256. Dried chips can be stored in polyethelene bags, gunny sacks or bins. Polyethelene bags are better than sacks.
257. The bags must be stored on wooden pallets in dry, ventilated areas.
258. The storage area must be kept clean. It must be free from pests, especially from the sweet potato weevil.
259. If you have stored the chips properly, they can be kept for over six months.
260. Dried chips can also be milled and stored as a meal. Sweet potato tuber meal stores better than chips.
261. In this booklet, you have learned about the feed value and various aspects of the processing of cassava roots and sweet potato tubers. You now know how to make dried chips from them and how to store them for a long time. You have also learned about how to make silages from them.
262. In Booklet No. 46, you will learn about how you can use the
processed cassava and sweet potato to feed various
animals.