 |
| ||||||||||||||||||||||||||||||||||||||||||||||||||||||||||||||||||||||||||||||||||||||||||||||||||||||||||||||||||||||||||||||||||||||||||||||||||||||
|
| ||||||||||||||||||||||||||||||||||||||||||||||||||||||||||||
Published by arrangement with the
Institut africain pour le
d�veloppement �conomique et social
B.P. 8008, Abidjan, C�te d'Ivoire
FOOD AND AGRICULTURE ORGANIZATION OF THE UNITED NATIONS
Rome
1976
FAO Economic and Social Development Series No. 3/1
First published 1970
Reprinted 1972
Second edition
1976
Reprinted 1983
P-69
ISBN 92-5-100140-5
© French edition, Institut africain pour le d�veloppement
�conomique et social (INADES) 1970
© English edition, FAO
1976
|
| ||||||||||||||||||||||||||||||||||||||||||||||||||||||||||||
Preface
This manual is a translation and adaptation of "La plante la plante vit, la racine," published by the Agri- Service- Afrique of the Institut africain pour le developpement economique et social (INADES), and forms part of a series. Grateful acknowledgement is made to the publishers for making available this text; which it is hoped will find widespread use at the intermediate level of agricultural education and training in English- speaking countries.
The original texts were prepared for an African environment and this is naturally reflected in the English version. However, it is expected that many of the manuals of the series a list of which will be found on the inside front cover will also be of value for training in many other parts of the world. Adaptations can be made to the text where necessary owing to different climatic and ecological conditions.
Applications for permission to issue this manual in other languages are welcomed. Such applications should be addressed to: Director, Publications Division, Food and Agriculture Organization of the United Nations, Via delle Terme di Caracalla, 00100 Rome, Italy.
The author of this English version is Mr. A.J. Henderson, former Chief of the FAO Editorial Branch.
|
| ||||||||||||||||||||||||||||||||||||||||||||||||||||||||||||
Plan of work
FIRST WEEK
Read pages 4 to 13 on the living plant.
· Pay great attention as you
read
· Begin the experiments of making a
plant germinate and lifting a plant.
· Look
after what you have sown.
· Water them every
morning.
SECOND WEEK
Read pages 14 to 19, on:
· How a root is made.
· How a rootlet is made.
· The inside of a root.
To help your memory read pages 4 to 13 again.
Study the new
lesson carefully.
Make sure you understand what rootless do {see page
17).
This lesson is rather difficult, but it is important.
THIRD WEEK
Read pages 20 to 26 on the different kinds of roots.
To help
your memory read pages 14 to 19 again.
Look at the drawings carefully so that
you understand the form of roots.
Study the page on sowing at the best
density.
Look at how you sow in your plantation or field.
FOURTH WEEK
Read pages 27 and 28.
Read the whole booklet again quickly.
· Try to answer the question paper without looking at the booklet.
Write your answers on a piece of paper.
Look in the booklet
to see if your answers are right.
Then write your answers on the question
paper, without copying from the
booklet.
|
| ||||||||||||||||||
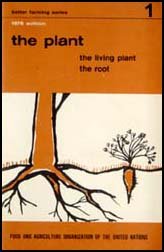
Better Farming Series 01 - The plant: the Living Plant; the Root (FAO - INADES, 1976, 29 p.)
Introduction
Why do we study the plant?
· You want a good crop of yams or cotton.
To get it you must learn how yams or cotton grow.
If you look
after the plants properly you will get good crops.
· You want animals that are in good health and heavier.
To get them, you must give them good grass and grains.
Then
you will get fat oxen and goats.
· Too much nitrogen on groundnuts does not help groundnuts to grow better.
Chloride on tobacco prevents the leaves from
burning.
Nitrogen on maize will produce stronger plants with more
grain.
So you must learn how to use fertilizers.
We must study plants and fertilizers.
|
| ||||||||||||||||||||||||
Better Farming Series 01 - The plant: the Living Plant; the Root (FAO - INADES, 1976, 29 p.)
The living plant
· Man is born, lives and dies.
The plant too is born, lives and dies.
· Man eats, feeds.
The plant too eats, feeds.
The plant gets its food in the
soil, through its roots.
· Man breathes.
The plant breathes too, through its roots.
· Man reproduces himself, has children.
The plant too reproduces itself.
It has flowers.
It has fruits.
It has seeds.
We must study how plants live.
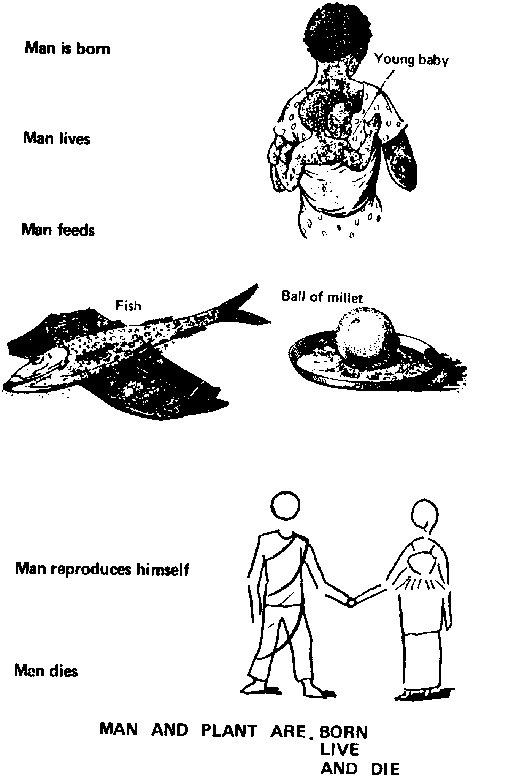
Man and plant are born live and
die
We make two experiments
We are going to see how a plant is born, that is, make it
germinate.
A seed germinates when the stem and the root come out.
Then we shall lift a plant.
Like this we shall understand
better the course on the plant.
We shall make these two experiments at the same time.
This will enable us:
to see better,
to observe better,
to understand better
how a plant grows and how a root is made.
First experiment
MAKING A PLANT GERMINATE
1. Take some containers which are no longer wanted, for instance, stone jars, empty cans, cracked gourds or gourds with holes in them.
Making a plant germinate
· Make a hole in the bottom of each container.
Make it big enough for a pencil to go through.
Container is big enough for a
pencil to go through
· Fill the containers with sand.
You will easily find some.
Do not press the sand
down.
Leave some space above the sand.
This space should be about equal to
a finger's thickness.
· Put your containers under a tree so that they are not in the sun.
Put them on big palm fronds or on branches so that they do not touch the ground.

They must not touch the ground and
be out of sun
· Get some water.
Pour water into your containers.
It should flow over the
edge.
· The water will pass into the sand and will make it damp.
The surplus water will flow out through the hole in the
bottom.
The containers are separated from the ground by the palm fronds or
the branches.
The water can easily flow away.
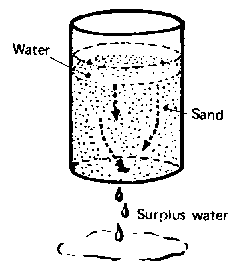
Water can easily flow away.
· The surplus water does not flow out quickly.
It stays on the surface of the sand.
That is because the sand
you have taken is too fine.
You must begin again.
Otherwise the seeds may
not grow.
· Look out for young goats and pigs.
They may knock over the containers.
Put up a screen to
protect your seeds.
2. Leave your containers of damp sand for a whole night.
The next day take four or five seeds of maize, millet, cowpeas
or beans.
Sow one seed in the middle of each container.
3. The way to sow.
Push your finger very gently into the sand as shown in the sketch below.

Push the finger into the soil
· When you have put the seed in the hollow made in this way, cover the seed with a very little sand.
· After sowing, water lightly.
If the water uncovers the seed, add some sand.
Water every
morning before the sun is really hot.
· Two or three days later, the root will grow, and five or six days afterwards the seedling will come above the soil.
The seed has germinated.
The stem and root come out.
Second experiment
LIFTING A PLANT OF MAIZE OR MILLET
One part of the plant is below ground the root.
Take care not
to damage the roots in lifting them out of the ground.
How to get the roots out of the ground
· You must pour a lot of water round the plant.
Take a gourd full of water.
Pour the water all round the
plant.
Wait until the soil is very damp.
If your finger will not go easily
into the soil, pour on still more water.
It is very important for the soil to
be very wet, otherwise you will break the roots in lifting them out.
If the
plant does not come out of the ground easily, pour on still more water.
· When you lift, take hold of the plant as near to the ground as you can.
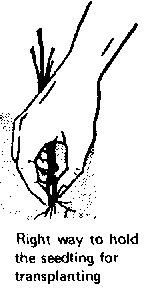
Right way for seedling for
transplating
· The part you are holding is called the stem.
The part that comes out of the ground is the root.
Right way to hold the seedling for transplanting
|
| ||||||||||||||||||||||||||||||||||||||||||||||||||||||||||||||||||||||||||||||
Better Farming Series 01 - The plant: the Living Plant; the Root (FAO - INADES, 1976, 29 p.)
The root
How is a root made?
· We lifted a plant.
Let us take a look at it.
· What do we see?
· A green part, in the air - the stem.
· A grey part, in the soil - the roots.
· Between the stem and the roots - the collar, or crown.
Let us look at the roots.
They are divided into smaller roots and rootless.
· The smallest roots are called rootless.
The rootless come at the end of the roots.
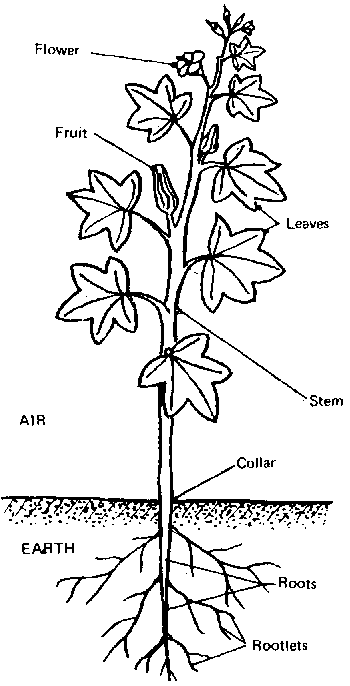
The plant and its
roots
How is a rootlet made?
· There are parts of the rootlet which perhaps you cannot see, because they are too small or because they have remained in the ground.
· To see them better, make another seed germinate. Put a bean seed in the earth. After three days lift it carefully. The root should be about as long as a match. To see better you need a lens. Perhaps your teacher can lend you one.
What do you see?
· At the tip of the rootlet there is the root- cap.
The root- cap is small and hard.
Its purpose is to enable the
rootlet to penetrate the soil.
· On the rootlet there are absorptive hairs.
· Above the absorptive hairs there is a dark, hard part.
This is the oldest part of the root.
It does not take in
food.
It does not absorb food.
The absorptive hairs of the rootlet
· There are very many of these hairs, but they are very thin, very short and very fragile.
You may not be able to see them.
These hairs are like those on your head, but they are very short, and thin, and there are very many of them.
These hairs are called absorptive hairs because they take from the soil the food which the plant needs in order to live and grow.
They are like little mouths which take in food for the plant.
The hairs absorb food.

A rootlet
A plant feeds only through the absorptive hairs on its rootless.
How is the inside of a root made?
Let us cut a root with a knife.
What do we see?
· On the outside is the skin.
· Under the skin is a hard, moist part, where the sap flows in little tubes called vessels that make up the vascular system.
Through this system the sap flows.
In man blood flows through
veins and other vessels.
In the plant sap flows through the vessels.

Vessels carry sap in the root
What are the foods which the plant takes from the soil?
They are mineral salts.
· In the soil, mixed with it, are mineral salts.
These mineral salts are the plant's food.
The mineral salts
and the water are absorbed by the root hairs.
They become sap in the plant.
When there are plenty of mineral salts in the soil, the soil is rich. The plant grows well.
· When there are not many mineral salts in the soil, the soil is poor. The plant grows badly.
The soil can be given mineral salts in the form of fertilizers and manure.
Different kinds of roots
· The roots of a maize plant, a millet plant and a rice plant are alike.
· The roots of a mango tree, an orange tree and a lemon tree are alike.
· The roots of maize, millet and rice are not like those of the mango tree, the orange tree and the lemon tree.
· Different plants have different roots.
Fibrous roots
Some plants have small, thin roots, all of the same length.
· These roots form a tuft, as for instance the roots of onion, rice, millet, maize.

Rice has fibrous roots
· A plant that has many small roots of the same length, the same thickness, the same shape, has fibrous roots.
Creeping roots
Some plants have roots that are shallow and long.
· Creeping roots do not go deep into the soil.
· These roots go a long way from the base of the plant.
They cover a large area.
They have to find in a small depth
of earth the food necessary for the life of the plant.
Many trees have
creeping roots.
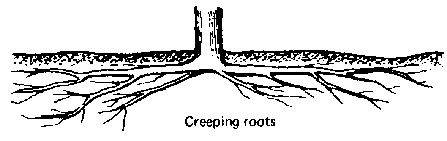
Creeping roots
· A plant that has shallow, very long roots has creeping roots.
Tap-roots
Some plants have only one root, very thick, deep, straight, called a tap- root.
· Smaller roots grow on this thick root; they are called rootless.
· Tap-roots go deep into the soil.
They cannot penetrate soil that is too hard.

Types of tap root
· Cotton, coffee, cocoa, okra, carrots, papayas all have a root that goes deep into the soil, is very thick and straight.
They have a tap- root.
Tuberous roots
Some plants have very thick roots.
· These roots store up food.
· These roots are thick because they have taken up a lot of food from the soil.
The food is stored up in order to feed the whole plant.
The
plant is said to have built up reserves.
For example, cassava.

Cassava roots
· A plant that stores up reserves in thick roots has tuberous roots.
Adventitious roots
In some plants roots start from the stem above the soil, that is, above the collar, and afterwards go down into the earth.
· Adventitious roots grow above the collar.
For example, mangrove, bamboo, maize and rice all have adventitious roots.
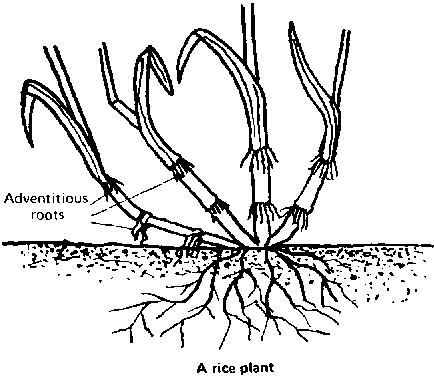
A rice plant
· Soil put around the collar helps adventitious roots to grow; the plant is earthed up.
· A plant with roots on the stems has adventitious roots.

Earthing up encourages
adventitious roots to
develop
|
| ||||||||||||||||||||||||||||||||||||||||||||||||||||||||||||
Sowing at the best density
· When seeds of maize or millet are sown too close together, each plant has not enough earth to make good roots, and to get good stems and ears of grain. The harvest will be poor.
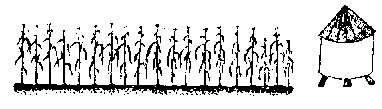
Seeds are sown too close together
· When seeds of maize or millet are sown too far apart, you harvest fine ears of grain, but there are not many of them.
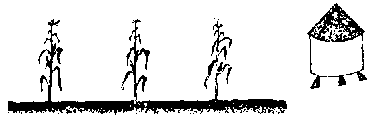
Seeds are sown too far apart
· Seeds must be sown so as to get the largest possible number of strong plants on the smallest area.
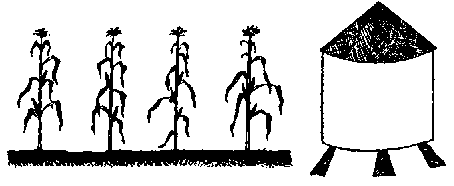
Seeds must be sown like this
· You must find out how many seeds can be sown in a field; you must sow at the best density.
|
| ||||||||||||||||||
Better Farming Series 01 - The plant: the Living Plant; the Root (FAO - INADES, 1976, 29 p.)
Summary of course
What are roots for?
1. Roots hold the plant to the soil.
· The rain, a stream or the sea sometimes pulls out roots.
Then the plant or the tree falls and dies.
To live, the plant
must remain held to the soil by its roots.
· The plant will be a fine one if its roots are strong.
To become vigorous, a plant must be able to spread its roots.
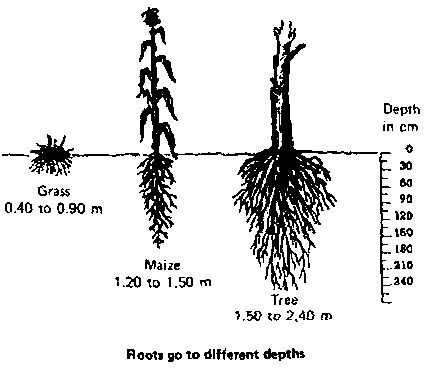
Roots go to different depths
2. Roots feed the plant.
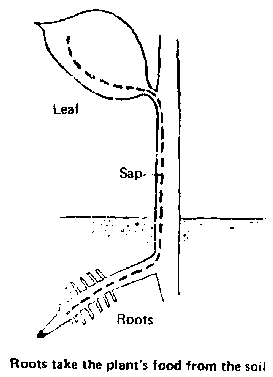
Roots take the plant's food from
the soil
· If the plant has well developed roots, it will be well fed and the harvest will be better.
· If the plant can get more foods from the soil, the plant will be well fed and the harvest will be better.
A plant is finer, gives a better harvest and produces more
· if its roots are better
developed,
· if the soil is
richer.
|
| ||||||||||||||||||||||||||||||||||||||||||||||||||||||||||||
Suggested question paper
FILL IN THE MISSING WORDS
The plant lives like all living things, the plant
...
reproduces itself and ...
The part of the plant that lives in the soil
is called the ...
The root serves to ... the plant to the soil,
and to ...
the plant.
The plant feeds through the ... of the rootless.
All roots are
not ... .
... roots stay on the surface of the soil.
... roots go down
deep into the soil.
... roots store up food.
ANSWER THE FOLLOWING QUESTIONS
Give some examples of tap roots.
What are creeping roots
like?
Why must the base of plants be earthed up?
What is a
rootlet?
Where does sap come from?
What are roots for?
Explain to a
friend why you must pay attention to the sowing
density.